Exterior 3D rendering does one thing nothing else can: it creates visual evidence of a building that doesn't yet exist. Without convincing exterior imagery, pre-sales campaigns underperform, lender presentations fall flat, and planning boards ask for more rounds of information. With strong exterior visualization, development teams run pre-sales before breaking ground, secure construction financing at better terms, and win planning approval with significantly less back-and-forth.
This guide covers everything a development team needs to know about commissioning exterior 3D rendering: which view types serve which purposes, what the twilight data actually shows, what to send your studio to get quality output, and how photomontage differs from standard CGI — and when you need it.
Quick answer: A complete exterior visualization package for a residential development includes five to eight views across multiple types — hero daytime, dusk/twilight, aerial, streetscape, and photomontage composites for planning submissions. The right combination depends on your project stage, your audience, and where your renders will be used.
Why exterior rendering is the foundation of pre-sales
Most construction lenders require 20–40% pre-sales before releasing financing. That threshold exists to validate buyer demand before capital is committed. The problem is obvious: you can't achieve pre-sales on a building that doesn't exist without showing buyers what they're purchasing. Exterior renders solve this directly.
Alternative approaches fall short in predictable ways. Floor plans require spatial imagination most buyers don't have. Site plans establish location but communicate nothing about architecture. Renderings of comparable buildings create the wrong associations. A photorealistic exterior render of the proposed building, placed accurately in its neighborhood context with correct landscaping and scale, eliminates the interpretation gap entirely.
I've seen development teams attempt pre-sales launches without professional exterior visualization and then pivot mid-campaign after poor early response. The visualization investment at the start of a campaign is almost always cheaper than re-launching after a slow open — first impressions in real estate marketing are durable. A flat launch sticks to a project for months and makes the second wave of marketing harder to execute.
The financial case goes beyond pre-sales rates. Projects with strong pre-sales evidence secure construction financing at better terms — in some cases at meaningfully lower rates. The visualization cost is partly offset by the improvement in debt terms on the construction loan. For a full analysis of the numbers, see our breakdown of 3D rendering ROI for real estate.
The five types of exterior renders and when to use each
Commissioning the wrong render type for the wrong audience is a common and avoidable mistake. Each type serves a distinct purpose, and a complete development visualization package usually includes all five at some stage of the project. Here's how to match render type to use case:
| Render type | Primary use | What it prioritizes | When to commission |
|---|---|---|---|
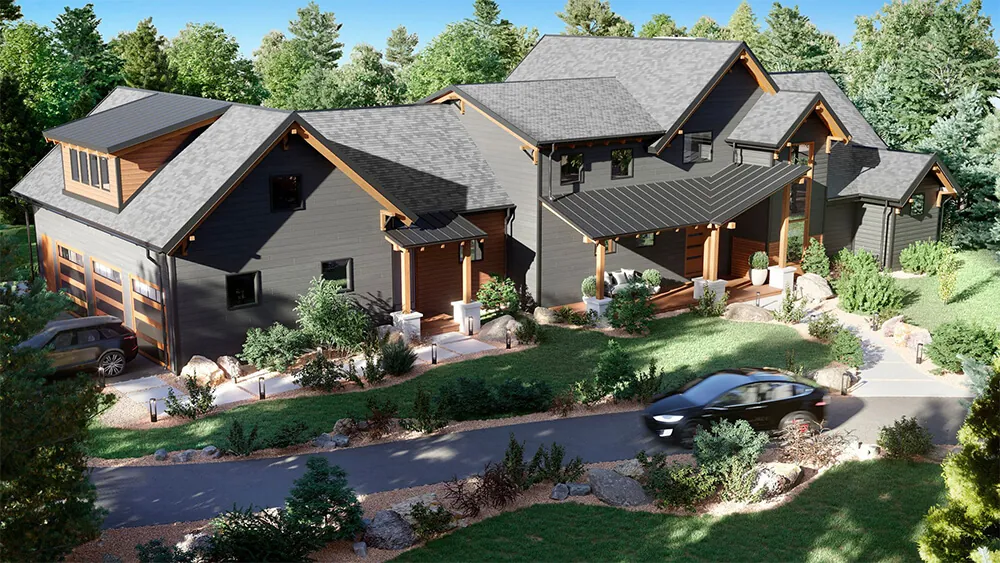
| Daytime hero | Project website, sales gallery, brochures, financing deck | Golden hour light, people, activated street level | Design development stage |
| Dusk / twilight | Marketing campaigns, luxury media, Instagram, broker emails | Interior light through windows, deep blue sky, landscaping lit from below | Same scene as hero — add as variation |
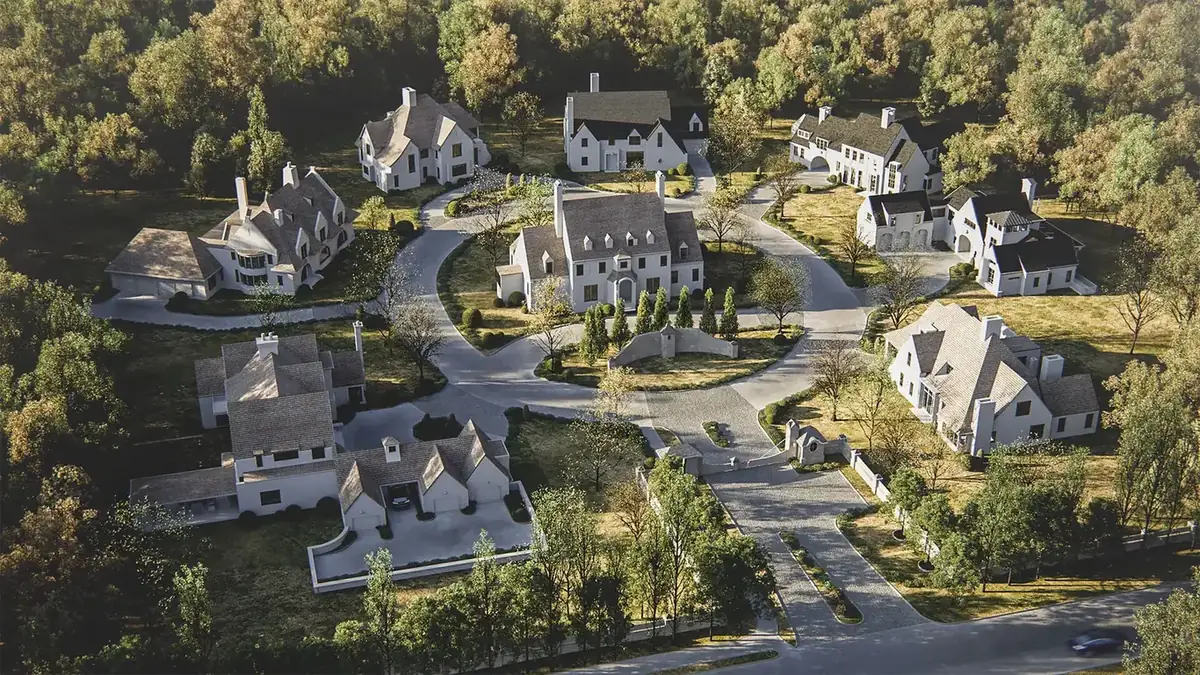
| Aerial / bird's eye | Investor decks, planning submissions, master plan context | Site relationship to transit, amenities, and context | Before financing round or planning submission |
| Streetscape / ground level | Community approval, design review, buyer experience | Pedestrian scale, ground-floor activation, neighboring buildings | With planning submission package |
| Photomontage | Planning submissions requiring verified views, site context | Accuracy of context; building composited into real site photo | When planning board requires verified view analysis |
For large-scale developments — master-planned communities, multi-tower projects — the aerial rendering often becomes the primary marketing asset rather than a supplementary view. At that scale, the site's relationship to its surroundings is part of the value proposition, not just a planning requirement.
The twilight advantage: why dusk renders consistently outperform daytime views
The performance data on twilight renders is unusually consistent across markets. Listings featuring a twilight or dusk exterior image receive 76% more online views than daytime-only listings.[1] Properties with dusk photography sell approximately 32% faster and typically command 8–12% higher prices than comparable daytime-only listings.[2] Despite this, only around 8% of current listings include any twilight imagery — which means it remains a genuine competitive differentiator rather than an industry standard.
The mechanism is straightforward. A daytime render communicates the building's architecture. A twilight render communicates how it feels to live there. The deep blue sky, warm light glowing from interior windows, and landscaping lit from below create an aspirational register that flat noon-light images simply don't achieve. The image reads as luxury before a buyer reads a word of copy.
For development marketing, the practical implication is clear. A twilight variation of your hero render typically adds 15–20% to the cost of that single image — because the studio builds both from the same scene, so the incremental production cost is modest. What you get is the image that will run in every luxury media placement, every broker email, and every social campaign for the life of the project. It is the single highest-ROI individual render in most development packages.
My recommendation: always commission one daytime and one twilight variation of your primary hero view. Use the daytime version for planning submissions, presentations, and floor plan brochures. Use the twilight version for every marketing channel where you're competing for emotional attention.
What to send your rendering studio
The quality and speed of exterior renders depends directly on what you provide. A studio can model a building from scratch given only floor plans, but that approach costs more, takes longer, and produces output that needs more revision rounds to match design intent. Providing complete materials at the start cuts delivery time and improves first-draft accuracy.
Here's what to send, ranked by impact on output quality:
| Item | Format | Why it matters |
|---|---|---|
| Building elevations — all four faces | PDF, DWG, or DXF | Defines facade geometry, fenestration pattern, and floor-to-floor heights |
| Floor plans | PDF, DWG | Establishes footprint, structural bays, and setbacks from site boundaries |
| Site plan | PDF, DWG | Positions the building on the site; shows neighboring context and landscape |
| 3D model (if available) | SketchUp (.skp), Revit (.rvt), ArchiCAD (.pln) | Reduces modeling time by 40–60%; greatly improves geometric accuracy from the first draft |
| Facade material specs | Written list, spec sheet, or material board | Cladding type, color, finish, texture for every visible element; without this, studios guess and revision rounds stack up |
| Landscape plan or direction | PDF or written notes | Trees, paving materials, water features, street furniture, planting scheme |
| Reference images | JPG or shared board | Target atmosphere, material inspiration, comparable projects you admire — these calibrate style faster than any written brief |
| Camera angle direction | Sketch, photo, or written notes | Which direction to face, which building faces to prioritize, key views to avoid |
| Output requirements | Notes or spec | Resolution, aspect ratio, and format for each intended use: web, print, hoarding, social crops |
The most common brief failure I see is sending drawings without material specifications. A studio can model the building accurately from good plans, but if the material palette isn't defined, they'll make assumptions — and revisions to correct material choices add two to five days to delivery and can require re-rendering entire scenes. Send even a rough material direction ("dark gray precast concrete, floor-to-ceiling glass with black aluminum frames") at the start of the project.
For projects at early schematic stage, approximate material directions are sufficient. You don't need a final spec sheet to start. Commission the renders now, update materials as the design develops, and use the first pass to pressure-test your design decisions visually before they become expensive to change in construction documents.
The four development audiences — and what each render needs to achieve
Exterior renders serve four distinct audiences across the development lifecycle. Each evaluates renders through a different lens, and a render optimized for one audience can actively underperform for another. Understanding which audience you're producing for should drive every composition and styling decision.
Investors and lenders
Financing audiences evaluate renders for credibility, not beauty. They're assessing whether this development looks financially viable, contextually appropriate, and architecturally serious. Renders for financing decks need to show the building in its accurate site context, convey quality without over-rendering, and be accompanied by aerials that establish the development's relationship to infrastructure. An idealized or overly stylized render can raise doubts in a lender presentation — the subtext is that you're compensating for architectural weakness with visual polish. Accurate, sophisticated, and contextually grounded is the brief for this audience.
Planning boards and design review committees
Regulatory audiences use renders to assess visual impact on the existing built environment. They check building height and massing relative to neighbors, facade character relative to the street, and how the base level activates the pedestrian zone. Planning renders must prioritize accuracy: correct surrounding buildings, accurate shadows from the proposed massing, and sometimes before/after comparisons from designated viewpoint corridors. A slightly stylized or overly idealized render can undermine credibility in a planning context — reviewers know what real buildings look like.
Buyers
Buyer-facing renders have the opposite priority: atmosphere over technical accuracy. Buyers aren't evaluating setback compliance. They're asking whether this is a building they want to live in — whether the address signals the lifestyle they're seeking, whether the design reflects quality they can trust. The best buyer-facing renders are shot in golden hour light, show the building in its best seasonal condition, feature activated ground-floor retail or amenities, and position the building against a sky that communicates aspiration. Every element in the frame is a decision, and each decision should serve the emotional response of a prospective buyer.
Brokers and agents
Brokers need renders they can use in direct client conversations — images that show well on a tablet, resize cleanly for email, and communicate the project's key selling points in three seconds. Build format versatility into the brief from the start: request square crops, portrait crops, and landscape crops for each hero view. Agents need the flexibility to use the same image across platforms without asking the studio to re-crop each time.
Photomontage vs. standard CGI: when accuracy matters more than atmosphere
A photomontage is a composite: a real photograph of the site is used as the base, and a 3D-rendered model of the proposed building is inserted into it with matched perspective and lighting. The result shows exactly how the building will look in its actual existing environment — real neighboring buildings, real street furniture, real sky, real existing vegetation.
This is different from a standard CGI exterior render, where both the building and its surroundings are modeled from scratch. Standard CGI gives the studio control over atmosphere and composition — they can idealize the neighborhood, choose the season, and set exact lighting conditions. Photomontage sacrifices that control in exchange for accuracy and credibility in contexts where the existing environment is what matters.
Three situations call for photomontage specifically:
- Planning submissions requiring verified views. Jurisdictions with strict visual impact assessment requirements — particularly for high-rise or high-visibility projects in established neighborhoods — often require renderings from designated viewpoint corridors, composited into real photographs taken from those exact locations. Verified photomontages are GPS-calibrated: the camera position, lens, and geometry are mathematically matched to the real photograph, producing a legally defensible visual impact assessment rather than an artistic impression.
- Projects with distinctive site contexts. When the real surroundings are part of the selling proposition — a waterfront location, a prominent corner, a historic streetscape — photomontage shows the building integrated into the actual environment more compellingly than modeled CGI context. Buyers and investors can see exactly what they're getting.
- Investor presentations for site-sensitive developments. When demonstrating that a building fits sensitively into a particular neighborhood is a key part of the investment thesis, photomontage is more persuasive than context built from scratch.
Note that verified photomontage requires a real site photograph taken from specific GPS-noted locations — typically by a specialist photographer with a calibrated camera — before the 3D work begins. This involves more production coordination than a standard render, and cost reflects that. If your planning submission requires verified views, specify this in your brief from the start so the site photography can be scheduled early in the project timeline.
What separates great exterior renders from average ones
The gap between a competent exterior render and an excellent one is visible to buyers, investors, and planning boards who have seen enough renders to recognize it. Professional-grade exterior rendering consistently shows these markers:
- Accurate lighting physics. Shadows fall at realistic angles for the stated time of day. Sky illumination wraps around the building naturally. Window reflections have depth and variation — not a flat white patch where glass should be.
- Material specificity. Concrete reads as concrete with the right texture and weight, not a plastic approximation. Glass has correct haze and layered reflections. Brick and stone show realistic texture variation. Generic, "this could be any building" materials are the most common quality failure. For projects incorporating sustainable architecture rendering — where green building features like solar panels, green roofs, and high-performance glazing are visible design elements — material accuracy extends to representing these systems correctly.
- Contextual integration. Surrounding buildings, street furniture, trees, and pedestrians exist at the right scale and density to make the subject building feel anchored in a real environment. Buildings rendered as if they exist in a vacuum look unfinished.
- Architectural camera work. Composition that uses real architectural photography principles: perspective correction, considered foreground elements, a relationship between the building's vertical edges and the frame. Good renders are composed like good photographs, not generated from a default viewport.
- Restrained post-production. Color grading that adds warmth and depth without making the image look digitally processed. The best renders look like an exceptional photograph, not like a render.
When evaluating a studio, review their portfolio of exterior work specifically — not interior renders or floor plans. The studio that excels at residential interiors may not have the same depth with commercial exteriors or large-scale aerial views. Request examples at a comparable project type and scale.
Timing and the financial case
The most common mistake developers make with exterior rendering is waiting too long. Renders should be commissioned at the end of schematic design or the beginning of design development — as soon as the design shows massing, facade character, and site context. Waiting for a fully finalized design often means missing the financing or marketing launch window by three to five months.
A good studio builds the 3D model so that design revisions are efficient. Facade material changes, massing adjustments, or additional floors can typically be updated at a fraction of the original cost. Starting early and iterating is both faster and cheaper than starting late with a final design.
The financial argument for treating exterior rendering as infrastructure rather than a marketing expense is straightforward: if visualization helps a 100-unit development achieve 40% pre-sales before construction rather than 15%, the difference in committed revenue dwarfs the visualization investment by a wide margin. For the full calculation, see our article on the ROI of 3D rendering for real estate. Developers working across the Southern California region will find our coverage of 3D rendering services in Orange County relevant for projects in adjacent markets. For specific pricing on exterior visualization packages, our rendering pricing page has a full breakdown by scope and project type.
Ready to launch your pre-sales campaign?
Send us your drawings and we'll have a scope and free estimate back to you within 2 hours. Exterior packages start from a single hero view and scale to full development visualization packages.
Request a Free EstimateFrequently asked questions
Sources
- PhotoUp / industry research: listings featuring a twilight exterior image receive 76% more online views than daytime-only listings. Referenced via Styldod, Day to Dusk Real Estate Photo Editing and corroborating sources.
- Properties with dusk photography sell approximately 32% faster and command 8–12% higher prices. Referenced via ReimagineHome.ai, Day-to-Dusk Magic.