"How many renders do I need?" is the question I'm asked most often before a project is scoped, and it's almost always framed as a budget decision. It isn't, at least not at the start. The number of renders a project needs is set by how many distinct things you have to communicate, and to whom. A single property going to market has a short list of things to show; a mixed-use development going through entitlements, investor review, and pre-leasing has a much longer one. Get the audience and the use right, and the count answers itself.
The short version: most projects land somewhere between 3 and 12 renders. A single-property real estate listing usually needs 3 to 5, a custom home 4 to 6, an interior project is counted per room, and a multifamily or mixed-use development typically needs 8 to 12. A single hero image for a teaser or a magazine placement might be just 1 or 2. Below is the full breakdown by project type, what drives the number up or down, and how to scope your own project without paying for views nobody will look at.
The quick answer: render counts by project type
This table reflects the packages we scope most often. Treat it as a sensible starting point, not a rule — the right number flexes with how many buildings, rooms, and stakeholders are involved. The "recommended views" column matters more than the raw count, because the wrong five renders are worth less than the right three.
| Project / use | Typical render count | Recommended views |
|---|---|---|
| Single hero / teaser image | 1–2 | One signature angle — the exterior or interior that best captures the project |
| Real estate listing (single property) | 3–5 | 1–2 exteriors (front + rear/garden), 2–3 key interiors (living, kitchen, primary suite) |
| Custom home / single-family marketing | 4–6 | Front and rear exterior, 2–3 main interiors, optional twilight hero |
| Interior project | 1–2 per room | One main angle per space, a second for a detail or alternate finish |
| Condo / apartment pre-sales | 6–10 | Exterior, amenity space, 2–3 model-unit interiors, a 3D floor plan, an aerial |
| Mixed-use / commercial development | 8–12 | Aerial/site, streetscape, entry, 2–3 interiors, amenity, a twilight view |
| Master plan / large development | 10–15+ | Multiple aerials, several streetscapes, key buildings, phasing views |
| Funding / entitlement application | 3–6 | Site or aerial, exterior elevation, streetscape, a representative interior |
What actually drives the number — and it isn't the building
One reframe helps more than any rule of thumb: count the decisions, not the building. Each render exists to answer a question a specific audience is asking. When a render doesn't map to a real question someone needs answered, it's decoration, and decoration is the first thing to cut.
Run your project through three filters before you settle on a count. First, audience: a buyer browsing a listing, a planning officer checking objective standards, a lender's committee underwriting a loan, and a neighbor at a community meeting all need different views. Second, use: a website hero works at one scale, a permit submission at another, a printed brochure at a third. Third, stage: the same project needs different visuals at concept, entitlement, sales, and lease-up.
A single-family home sold to one buyer compresses all of this — one audience, one channel, one moment — so three to five renders cover it. A development moving through entitlements, then an investor raise, then pre-leasing spreads those questions across months and audiences, which is why the count climbs to eight, twelve, or more. The building didn't get more complicated; the conversation did. Scope to the conversation and you'll rarely over- or under-order.
How many renders for a real estate listing or single property
For a single property going to market, the working range is three to five renders, and the logic is straightforward: cover the exterior the way a buyer first encounters the home, then the two or three interior spaces that actually sell it. A frequently cited industry baseline is four images (roughly two exterior and two interior), and that holds up well as a default for a standard single-family listing.
The exteriors do the work of first impression. A front exterior rendering establishes curb appeal and architectural character; a rear or garden view sells the lifestyle and the indoor-outdoor relationship buyers increasingly prioritize. On the interior side, lead with the spaces buyers make decisions in — the open living area, the kitchen, and the primary suite. Those three interior renderings carry more weight than a render of a hallway or a secondary bedroom ever will.
Push the count toward five or six when the home has a standout feature that deserves its own frame — a double-height entry, a statement staircase, a pool, a rooftop deck. Pull it back toward three when the property is modest or when one or two strong images are enough to drive inquiries. If you want a single show-stopper for the top of the listing or a paid ad, a twilight exterior is the most reliable hero shot in real estate.
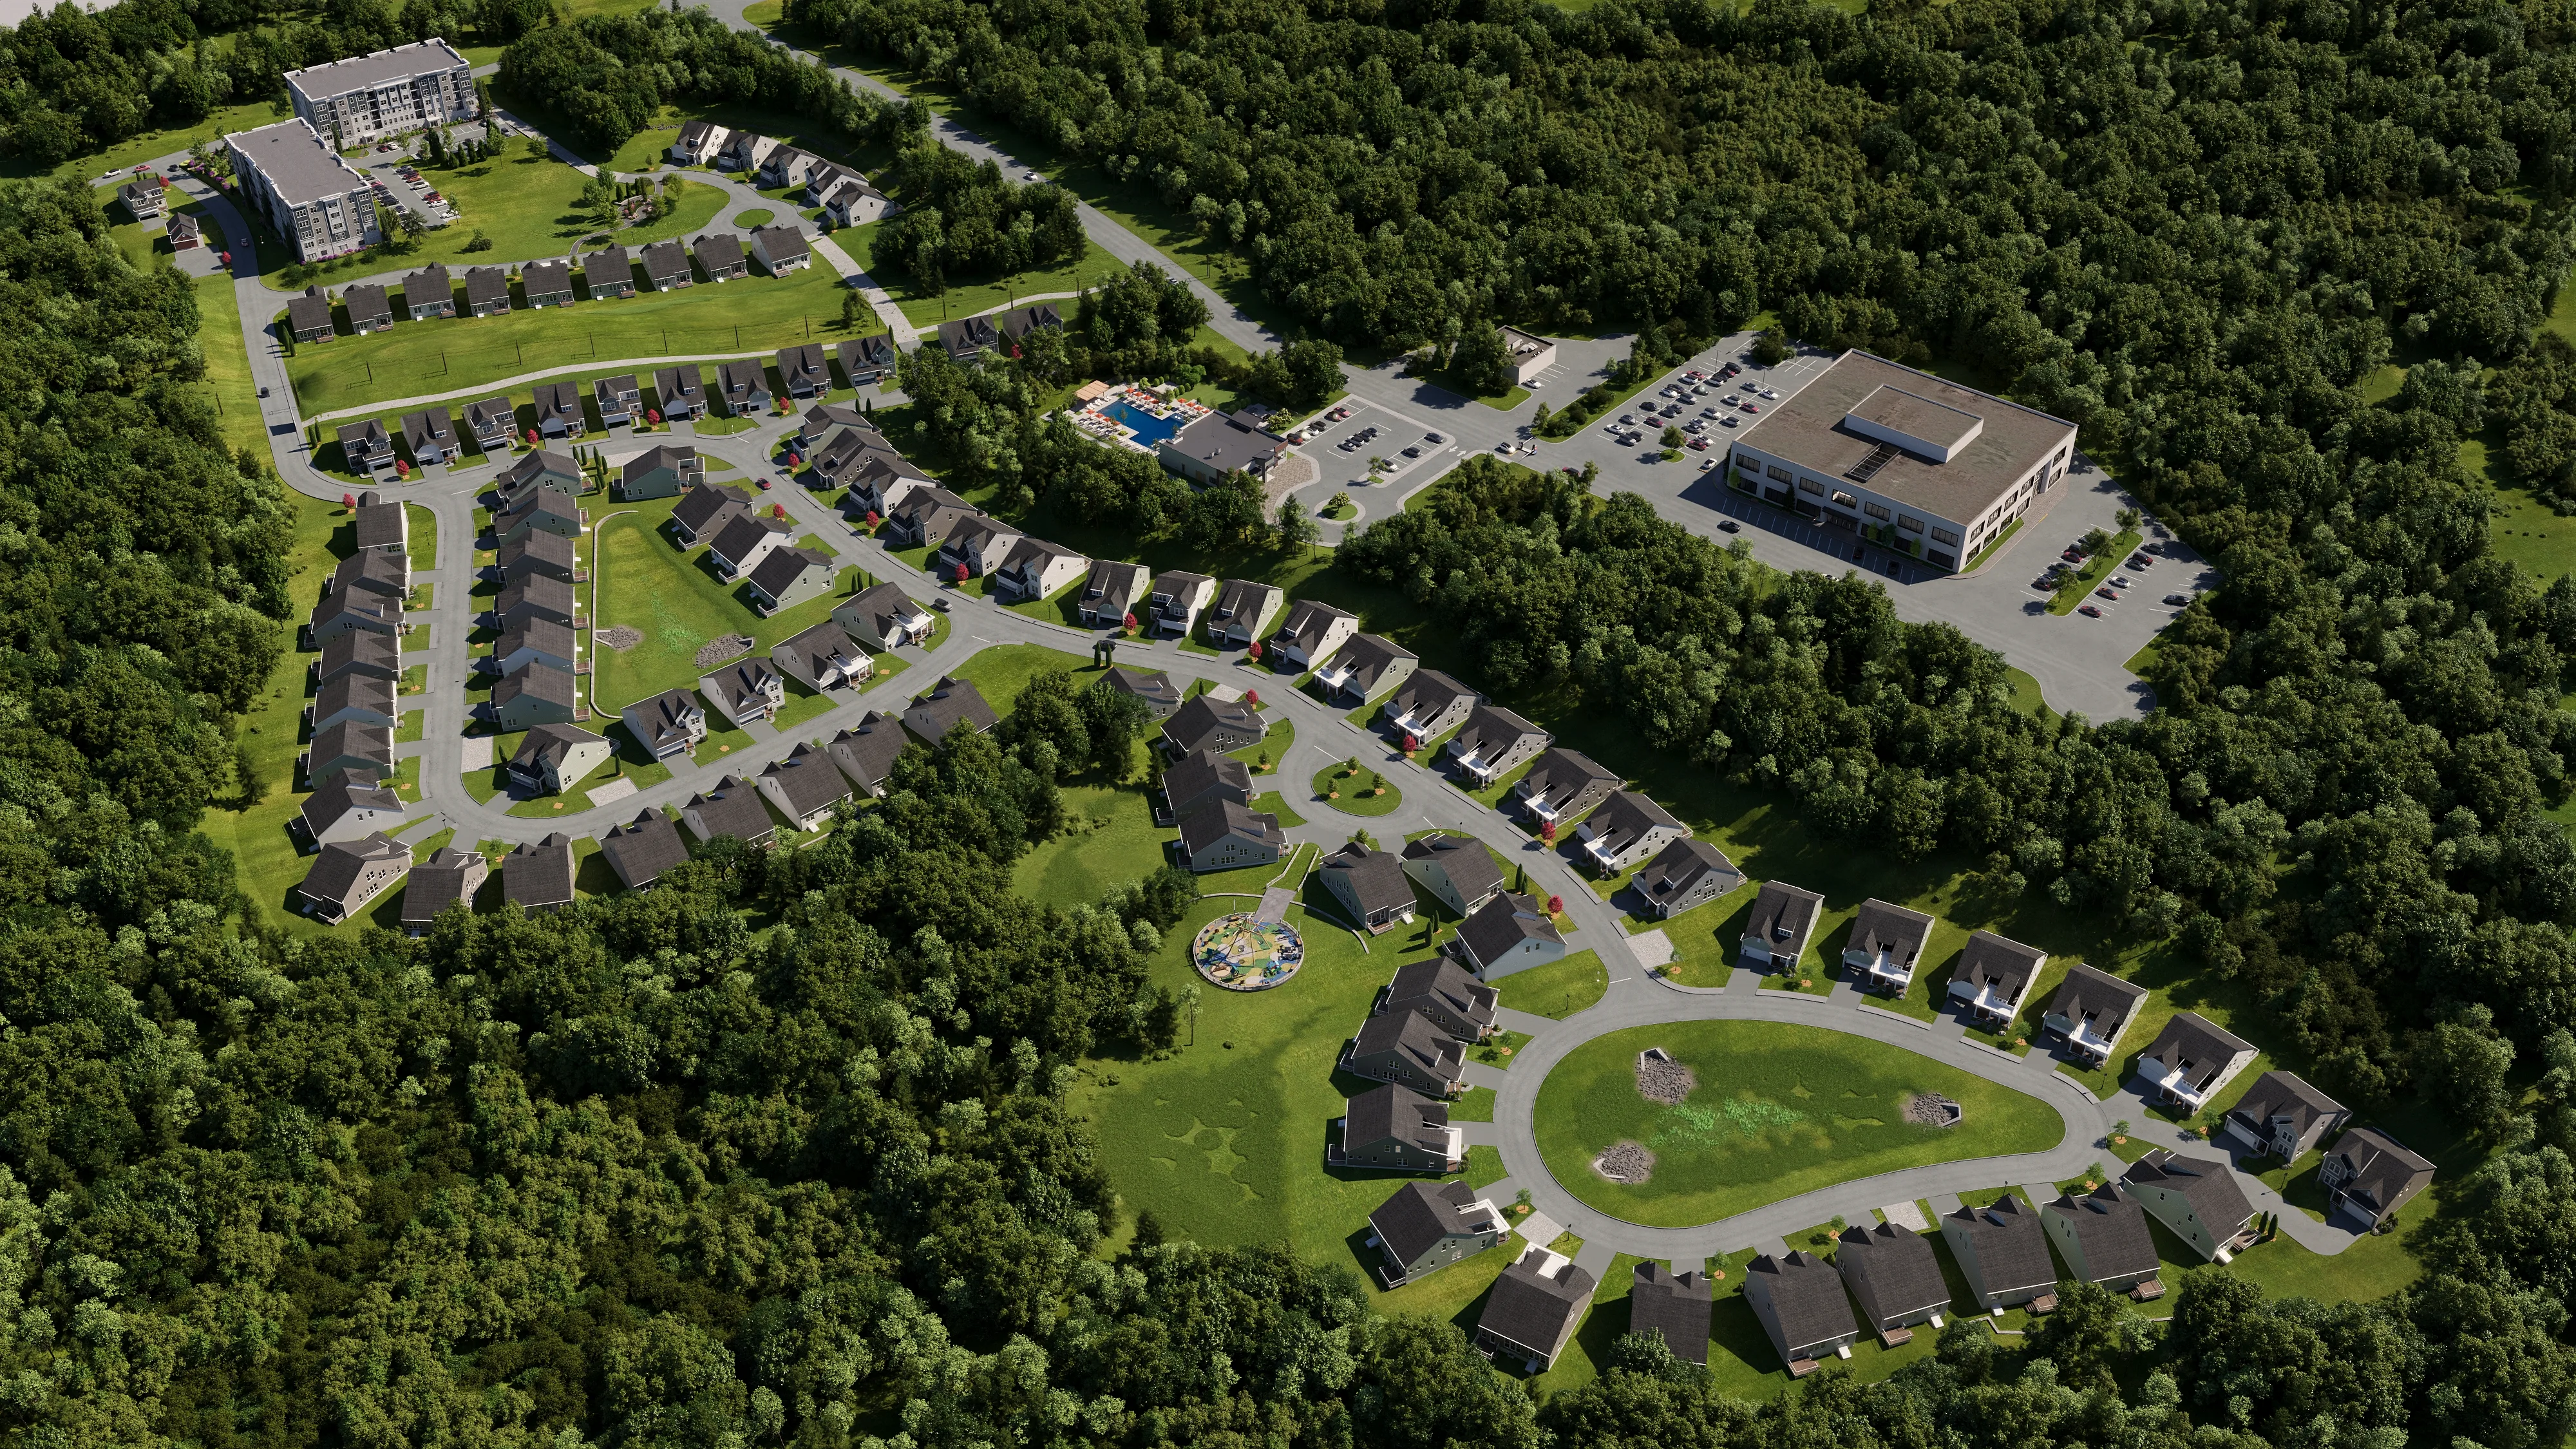
Scoping renders for a multifamily or mixed-use development
Developments are where render counts expand, because a single project has to satisfy several audiences in sequence. A condo or apartment pre-sales package typically runs six to ten renders; a mixed-use or commercial development eight to twelve; a master plan fifteen or more. The driver isn't vanity. Each stakeholder group needs its own view to act, and for rental communities a leasing audience adds another — see 3D rendering for build-to-rent.
Start with the aerial or site view, which does double duty: it shows massing and context for planning review and gives investors the scale of the opportunity. Add a streetscape or pedestrian-level exterior that demonstrates how the building meets the sidewalk; this is the view that planning staff and community members react to most strongly. From there, layer in the amenity spaces (lobby, courtyard, rooftop, fitness), two or three representative unit interiors, and a 3D floor plan that helps buyers and brokers understand layout without reading a blueprint.
For larger or phased projects, plan for multiple aerials and streetscapes — different vantage points, and in many cases different phases — plus hero views of the signature buildings. A practical way to avoid over-ordering on a big development is to scope by stage rather than commissioning everything at once: the entitlement set, the investor set, and the lease-up set overlap but aren't identical, and ordering them in sequence keeps spend aligned with the milestones that justify it. Our guide on 3D rendering for developers walks through that stage-by-stage logic in detail.
Interiors: count by room, not by building
Interior projects follow a different counting logic than exteriors, and conflating the two is the most common scoping mistake I see from designers and homeowners. You don't count an interior project by the property — you count it by the room. The baseline is one main angle per space you want to show, with a second angle reserved for rooms that have a detail worth its own frame or a material decision the client is weighing.
One render per room captures the space as a buyer or approver will experience it: the composition that shows the layout, the light, and the relationship between zones. A second render earns its place when there's a reason — a kitchen where the client wants to compare two countertop finishes, a primary bath where the shower detail is the selling point, a living room where a daytime and an evening mood tell different stories. Beyond two per room, you're usually past the point of useful information for most residential work.
This is also where choice of style and lighting can substitute for extra renders. A single, well-considered angle in the right light often does more than three competing views of the same room. If you're a designer scoping client work, count the rooms that drive the decision, assign one angle each, and add second angles only where a specific question demands one. For a deeper look at briefing room-by-room, see 3D rendering for interior designers.
The view that does the real work: angles over volume
More images often weaken a presentation rather than strengthen it. An analysis of 350 winning architecture competition entries found that award-winning boards averaged just 2.97 images per panel, and that juries typically spend no more than 30 seconds per submission on a first pass. Roughly 77% of winners relied on photorealistic or high-quality renderings. A few decisive views beat a long set of adequate ones.
The same holds for marketing and sales. When you add a sixth and seventh render that mostly repeat what the first three already said, you dilute attention across redundant images and raise cost for nothing. What pays off is choosing angles that each carry a distinct piece of the story: the hero that creates desire, the view that answers the biggest objection, the detail that proves quality.
This is why "how many renders" and "which views" can't be separated. Before adding a render to the count, I ask whether it answers a question the existing renders don't. If it does, it earns its place. If it's another angle on a story already told, the budget is better spent on a single stronger view (better lighting, better staging, a better camera position) than on one more adequate image. Our guide on how to brief a rendering studio covers choosing those angles deliberately.
How render count maps to budget and timeline
Once you know the count and the views, budget and timeline follow predictably, because most studios — including ours — price per image or per view rather than per project. That structure is the developer's friend: it means you can scope precisely to the renders you'll actually use, and add views later as a project moves from entitlement to sales without re-quoting the whole package.
Two variables move the price of any single render beyond the headline view count. The first is complexity: a photorealistic interior with custom furniture and intricate lighting takes more hours than a clean exterior elevation, and a detailed aerial of a master plan more than a single-unit view. The second is everything bundled around the image: the number of revision rounds, output resolution (web versus large-format print), and whether you need stills only or also animation and 360° views, which are scoped differently again.
So scope the views first and price them second. Decide what the project needs to communicate, build the view list from that, and only then turn it into a quote. That order avoids the two expensive mistakes: ordering a large package "to be safe" and using half of it, or under-ordering and scrambling for views mid-campaign. For how we estimate individual projects, see our pricing page and our breakdown of how much 3D rendering costs.
A simple way to scope your own project
You can scope almost any project in a few minutes with a short checklist. Work through it in order and the render count, and the view list behind it, will emerge on its own.
- List the audiences. Who has to act on these images? Buyers, brokers, planners, lenders, partners, neighbors — each that applies usually needs at least one view aimed at them.
- List the channels. Where do the renders go — listing, website hero, brochure, permit submission, investor deck, social? Different channels can share renders, but flag any that need a dedicated format.
- Count the spaces that drive decisions. Exteriors that create first impression; interiors where buyers decide. Assign one view each, then add a second only where a specific question demands it.
- Add the context views. For anything larger than a single property, include at least one aerial or site view and one streetscape; they carry the planning and scale story nothing else does.
- Cut the redundancies. Remove any render that mostly repeats a story another already tells. Reinvest that budget in making your strongest one or two views excellent.
- Phase the big ones. For developments, split the list into entitlement, sales, and lease-up sets and order them as milestones arrive rather than all at once.
Not sure how many renders your project needs?
Send us your drawings and where the images need to go — we'll scope a view list and a fixed-price package, and send a free estimate within 2 hours.
Request a Free Estimate