The quality of a 3D render is determined by two things in combination: the skill of the studio and the quality of the brief you give them. A skilled studio working from a poor brief will produce technically proficient work that misses your design intent. The same studio working from a complete, specific brief produces renders that match your vision with minimal back-and-forth.
Most revision cycles trace back to incomplete briefs, not to studio performance. The studio made an assumption — about a material, a camera angle, a lighting mood — because they didn't have enough information to make a decision. Assumptions compound: the studio builds the scene based on their interpretation of what you wanted, you receive a first draft that's technically correct but aesthetically wrong, and the project enters a revision loop that eats time and budget.
A complete brief doesn't require more work — it requires organizing what you already know before sending it. This guide covers everything to include, why each element matters, and how the requirements change depending on whether you're briefing exterior, interior, or aerial work.
The complete brief checklist
Here's a summary of every element a complete brief should contain, with priority levels. Detail follows in each section below.
| Brief element | What to include | Priority |
|---|---|---|
| Project files | Current 3D model (.skp, .rvt, .3dm) OR floor plans + all elevations (PDF/DWG) | Essential |
| Site plan | Accurate plan for any exterior or aerial view; satellite image for context if needed | Essential for exteriors |
| View list | Camera location (marked on plan) + direction + height + aspect ratio per view | Essential |
| Material specs | Manufacturer + product name + finish type for all surfaces visible in target views | Essential |
| Reference images | 8–12 annotated images: atmosphere, materials, lighting mood, entourage level | Essential |
| Lighting direction | Time of day + sky condition + artificial lighting intent per view | Important |
| Key message | What should viewers understand within 3 seconds of seeing this render? | Important |
| Timeline | Hard delivery date (if any) + how firm it is | Important |
| Delivery format | Resolution + file format (JPG/PNG/TIFF) + delivery method | Important |
| Revision scope | Single point of contact who will consolidate all feedback before sending | Important |
Why most briefs fail — and the one question that fixes it
The most common brief failure is not missing information — it's missing purpose. Briefs that describe what the building looks like without saying what the render needs to achieve leave the studio making creative decisions that belong to you.
Before you compile any files, answer this question: what should a viewer understand within three seconds of seeing this render? "This is a building I'd want to live in." "This project is financially serious and architecturally credible." "This kitchen is warm and livable, not a showroom." The answer to that question drives every downstream decision the studio makes — framing, lighting temperature, entourage density, time of day, post-production tone.
Include a one-sentence key message per view in your brief. It's the highest-leverage thing you can add because it orients all the judgment calls the studio will make on your behalf. A technically complete brief without a key message produces work that hits all the marks and still feels slightly off. A brief with a clear key message — even when some technical details are missing — produces work that feels right.
Project files: what to send and how to organize it
The studio's first production step is building a 3D model from your design documentation. What you provide determines how accurate that model can be and how long it takes to build.
3D model (highest priority). If you have a SketchUp, Rhino, Revit, or ArchiCAD model, send it. Even a rough massing model reduces modeling time significantly and improves geometric accuracy. Include all geometry visible in target views, with clearly labeled layers. A well-organized model — where structural elements, interior fixtures, and site elements are on separate layers — can cut modeling time in half compared to a poorly organized one.
2D drawings (when no 3D model is available). Provide dimensioned floor plans at every level visible in any target view, all relevant building elevations, and any sections that show spatial relationships — ceiling heights, level changes, structural features — not visible in plan or elevation. The studio will build a 3D model from these drawings; factor the additional modeling time into your timeline when you're setting a deadline.
Site plan or survey. For exterior renders, aerial views, or any view where the building's relationship to its surroundings will be visible, provide an accurate site plan. For aerial views requiring significant surrounding context, a satellite image or topographic survey helps the studio build accurate surroundings rather than approximating them from scratch.
File organization. Use a shared folder rather than email attachments. Organize by type: drawings, 3D model, references, material specifications. Include a brief text note indicating which files are current — the studio should not spend time figuring out whether a file is the latest version. Label files with dates or version numbers. Uncertainty about file currency leads to modeling from the wrong drawing, which is an expensive mistake to catch in revision.
Views and camera positions
Specify every view with as much precision as you can. The more specific the camera brief, the closer the first draft is to the image you actually need.
For each view, specify:
- Camera location — annotate your floor plan (or site plan) with an approximate camera position and an arrow showing the direction of view. Even a rough hand-marked sketch communicates more than a written description.
- Camera height — eye level (approximately 5 feet) is standard for interior views and street-level exteriors. Specify if you want a higher or lower angle — lower creates more drama; higher gives more spatial overview. For a full breakdown of angle choices, see our guide on how to choose camera angles for renders.
- Lens or field of view — wide-angle (24mm equivalent) is standard for interior spaces; 35–50mm is common for exterior views and details. If you have a reference image with the composition you want, include it — the studio can match the focal length from the visual.
- Aspect ratio — 16:9 for digital presentations and web; closer to 4:3 for most print layouts; custom if your marketing format requires it. State this before production starts because it affects how the entire scene is set up.
If you're genuinely unsure what view will tell the story most effectively, say so and ask the studio to propose options. A good studio will suggest views that showcase the design's strengths — that's a legitimate part of the brief conversation.
Material and finish specifications
Material specifications are the most commonly incomplete part of a rendering brief, and the omission has the highest revision cost. Generic placeholder materials are the primary reason first drafts feel flat or unconvincing. A render with accurately specified materials looks like the actual project. A render with generic approximations looks like a stock visualization.
For every surface clearly visible in a target view, specify:
- Manufacturer and product name — "Porcelanosa Marmol Carrara 45×120, honed finish" is a specification a studio can match accurately. "Light grey stone" is a direction they'll interpret, probably differently than you imagined.
- Finish type — matte, honed, polished, brushed, glazed, satin. The same material in two finishes can look completely different at scale.
- Pattern and grain direction — for wood, stone, and tile: running direction, grout joint width, specific pattern (stacked, offset, herringbone).
- Reference images — where you can't name the exact product, a close reference image is more useful than a description. The studio can match a visual reference more accurately than they can interpret language.
If finish specifications are still being finalized, tell the studio which surfaces are confirmed and which are flexible. For flexible surfaces, ask the studio to propose options at draft stage — seeing material choices in context, in the actual space with the actual lighting, often helps finalize decisions faster than evaluating samples in isolation.
Lighting and atmosphere
Lighting has more impact on the mood and perception of a render than almost any other variable. Be specific, or you'll receive the studio's default — which may be technically accomplished but may not match the atmosphere your project needs.
For each view, specify time of day (morning / golden hour / late afternoon / dusk / evening), sky condition (full sun with defined shadows / partly cloudy with soft fill / overcast with flat even light), and artificial lighting intent for interior views (natural light dominant daytime feel, or evening conditions where artificial sources are primary). A reference image showing the lighting quality you want — annotated with "this shadow quality" or "this warmth" — is worth more than a paragraph description.
For exterior marketing renders: golden hour is the most common choice for residential; midday works for commercial projects where precision and clarity matter more than warmth. For interior renders: late afternoon natural light with supplementary artificial is a versatile default; evening artificial-only creates luxury hospitality atmosphere that reads well in marketing materials.
How briefing requirements differ by render type
The core brief elements above apply to all render types. But exterior, interior, and aerial renders each have specific requirements that most clients don't think to include — and missing them is where type-specific first draft problems come from.
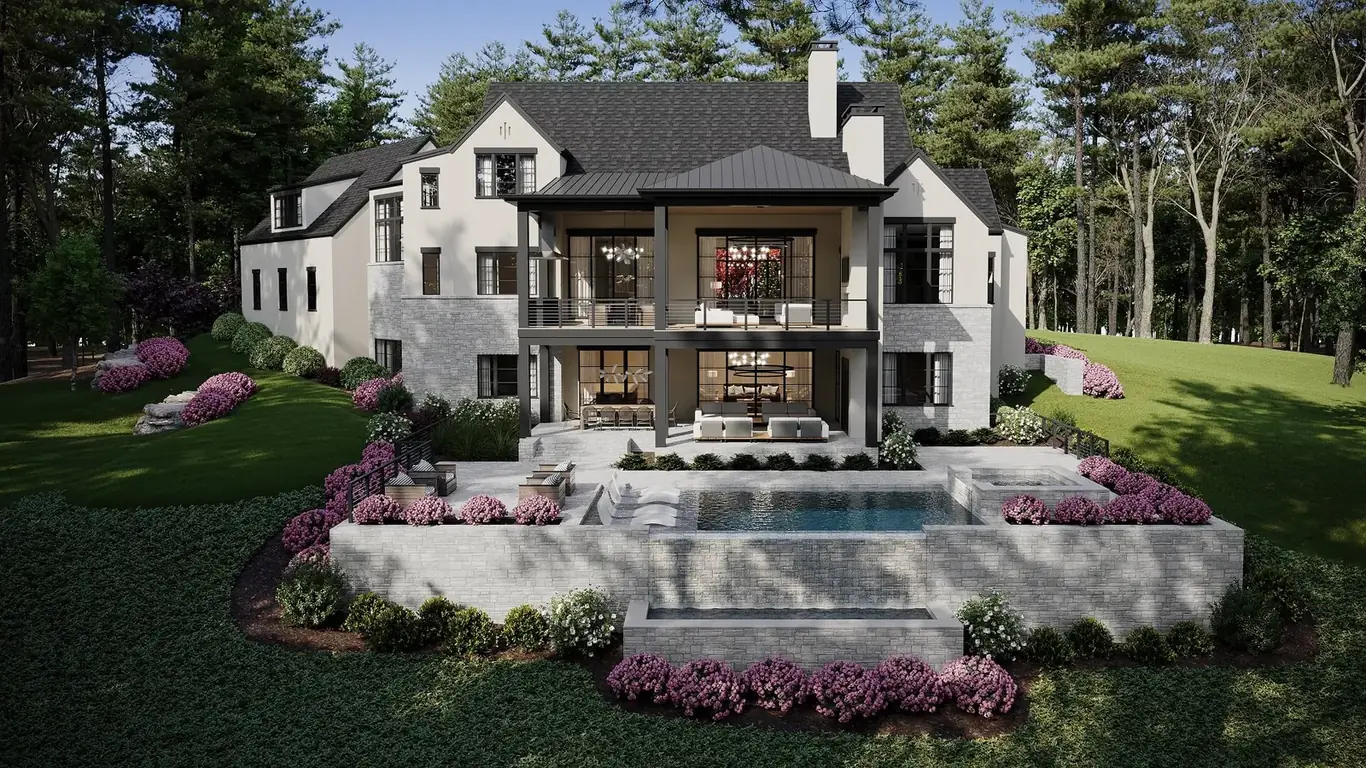
Exterior renders
Beyond the standard brief, include: compass orientation of the building (critical for accurate shadow calculation — the studio needs to know which way is north), landscape direction or landscape architect's plan if available, desired season and foliage state, neighboring buildings or street context to include or exclude, and any street furniture, vehicles, or site features that should or shouldn't appear. For marketing renders, specify whether you want the street activated with pedestrians — and what kind of people they should be (residents, office workers, shoppers).
Interior renders
Include ceiling heights (often missing from 2D plan sets), exact window dimensions and placement (these control how light enters and dominates the scene), furniture schedule or style direction (studio-selected library furniture vs. specified pieces), artificial lighting fixtures by brand and model if specified, and any decor or styling notes — plants, art, books, table settings. For hospitality interiors, operational details matter: a restaurant at service vs. an empty room reads completely differently.
Aerial and bird's-eye views
Aerial views require the most contextual information. Include: the extent of surrounding context to model (how many city blocks, how much landscape), approximate heights of neighboring buildings, any specific landmarks or infrastructure to include, and the target altitude and angle of the view. For marketing aerials, clarify whether surrounding context should be accurate or idealized — some developers prefer a more abstracted context to keep focus on the project itself.
3D floor plans
Confirm exact dimensions and confirm all door and window positions are accurate in the drawings — errors in plan drawings appear directly in the floor plan render. Specify furniture placement preference (studio-selected or from a schedule), and confirm whether the floor plan will show the space furnished or as a bare architectural plan.
How the brief changes depending on what the render is for
Most briefing guides organize requirements by render type — exterior, interior, aerial. That's useful, but there's another dimension that matters at least as much: what the render is actually being used for. A pre-sale marketing render, a design development working image, and a client presentation render all have different requirements — even if they show the same space.
Pre-sale and marketing renders
These renders sell units or secure investor confidence before construction. The brief emphasis shifts toward storytelling: atmosphere, lifestyle, the feeling of the finished space rather than technical accuracy of every fixture. You typically have design documentation that's still evolving, which means the brief needs to be explicit about what's locked and what's illustrative. Tell the studio which design elements are confirmed and which should look aspirational but aren't yet finalized. Reference images here carry more weight than material specs — the render needs to be emotionally compelling, and that comes more from lighting and atmosphere choices than from accurate tile specifications. Lead with your key message per view: "this should feel like a home, not a show apartment" or "this exterior needs to read as architecturally serious from a distance."
Design development renders
These are working images made to help you evaluate design decisions — massing options, material combinations, spatial proportions. Speed and accuracy matter more than post-production polish, and the brief should reflect that. Flag explicitly that these are development renders, not marketing deliverables, so the studio prioritizes fast turnaround over extensive refinement. Include multiple options you're deciding between — "Option A: brick façade, Option B: render panel" — rather than one locked specification. Camera angles should be diagnostic: views that expose the design decision being evaluated rather than views that flatter the project. These renders don't need lifestyle entourage, activated streets, or dramatic sky conditions. Clean, neutral lighting that lets the architecture read clearly is usually right.
Client presentation renders
These are the images architects and interior designers show to clients during the design process. The brief priority is communication of your design intent in terms a non-architect will understand immediately. Avoid extreme angles and very wide lenses that read well to designers but confuse clients about actual scale. Specify eye-level views, natural lighting conditions, and furniture that looks livable rather than editorial. If your client will see this render as the primary way of understanding the design, include that context in the brief — the studio can calibrate complexity and realism accordingly. A client who's never read a floor plan needs different spatial framing than a developer who spends their week reviewing design documentation.
These use-case distinctions are rarely documented in a brief, which is precisely why they produce surprises at first draft. Add one sentence per view — "this is for a pre-sale brochure" or "this is for a client meeting next Thursday" — and it changes how the studio makes every judgment call in production.
Revision management: the part that determines timeline
A complete brief prevents most revision cycles. But the way you manage the revision rounds you do have determines whether your project finishes on schedule.
The most expensive revision pattern is fragmented feedback: multiple people — architect, developer, interior designer, marketing team — each sending separate emails over several days, sometimes contradicting each other. The studio receives four sets of notes, some overlapping and some conflicting, and doesn't know which to act on. The result is a confused second draft and a wasted revision round.
Designate a single point of contact who consolidates all feedback before sending it. All stakeholders review the draft; one person compiles the notes into a single annotated PDF or organized document. This is not a logistics preference — it's the most reliable way to keep projects on their agreed timeline. A consolidated document, delivered within 48 hours of draft receipt, keeps production moving. Piecemeal feedback delivered over a week turns a structured revision round into an open-ended support loop.
Also clarify at brief stage what constitutes a revision within scope versus a scope change. Camera angle refinements, material adjustments, lighting tweaks — these are revisions. A new view not in the original brief, a design change that requires re-modeling, a complete re-briefing of atmosphere — these are scope changes. Understanding the distinction before production starts prevents disagreements mid-project.
Before you brief, it helps to settle on scope — see our guide on how many renders your project needs. For a walkthrough of the full production process from brief to delivery, see our guide on what to expect from a rendering studio. For selecting a studio whose briefing process is organized and clear, see how to choose a 3D rendering studio. Our pricing page shows how we scope and quote projects, and our portfolio shows what the output of a well-briefed project looks like across render types.
Ready to brief your rendering project?
Send us your files and project details — we'll have a free scope and estimate back to you within 2 hours.
Request a Free Estimate